Knowledgebase
How can we help you?
How can we help you?
So this has happened: You are a happy owner of a hosting account, and you want to fill it with content - files. While you still seem happy, deep inside yourself, you start rambling on how to upload files and what a hassle this can turn out to be. But we will stop you right there: It’s not hard and we will prove it to you.
There are several ways to upload a site - we will provide you with the most common ones.
1. cPanel File Manager (recommended for a small number of files)
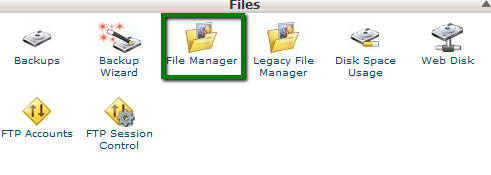
1. Go to cPanel > the Files section > the File Manager menu: 
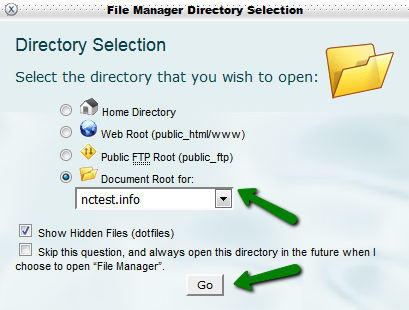
2. Choose Document root and a site you need to upload files for from the drop-down list and hit Go. If you want to go straight to public_html, check Web root: 
If you want to view hidden system files such as .htaccess ones or others, leave the box Show Hidden Fileschecked.
3. Click the Upload button: 
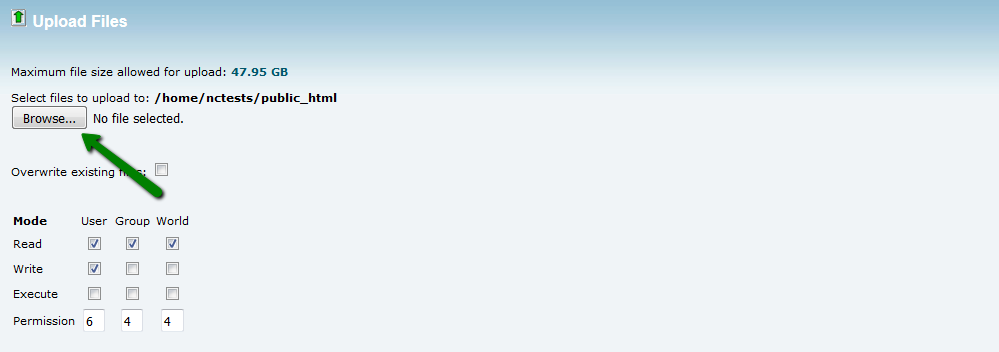
4. Then click on Browse... to select the file from your local machine: 
5. Once uploaded, you will see this message at the bottom on the right: ![]()
6. You can also extract or compress archives which is very helpful and fast especially when uploading/downloading multiple files: 
You can find a more detailed guide on how to use File Manager in cPanel here.
While File Manager is instantly accessible via cPanel and does not need to be installed additionally, it is considered to be less convenient than an FTP client.
2. FTP clients (recommended for a large number of files/if the website files are frequently updated)
An FTP client allows you to quickly handle files and get instant access to your web space. The only downside is that you will still need to use cPanel in case you want to extract files because FTP clients do not support this feature.
There are plenty of FTP clients, and you can choose one that’s up to you. If you ask us, we suggest that you use Filezilla - this is a popular FTP client with a friendly interface, easy to use and simple to configure.
1.Download the Filezilla client from the official site.
2. Once you’ve installed it and see the Filezilla icon on your desktop, launch the program.
3. It is possible to connect through different protocols:
FTPes (explicit SSL mode, encrypted):
Host: ftpes://server your account is hosted on
Port: 21
Protocol: FTP
Encryption: Require explicit FTP over TLS
Logon Type: Normal
User: your cPanel username
Password: your cPanel password
Once all the settings are filled out, click on Quickconnect.
You are ready now to work on your website!
The illustrated guide about the FileZilla setup can be found here.
3. Web-based FTP clients
Besides using a standard FTP client, you may also use a web-based FTP client, for example,http://www.net2ftp.com
The settings you will need to fill in are just the same as we pointed out in the previous paragraph.
NOTE: Files which are too big can't be downloaded, uploaded, copied, moved, searched, zipped, unzipped, viewed or edited; they can only be renamed, chmodded or deleted.
We won’t bore you more, so we stop right here. Hopefully, after having read this article you will happily upload your cool files and will be ready to absorb next techie bunch of wisdom!
We would like to congratulate you upon starting your own online business and thank you for... Read More
The activation period varies for our hosting packages:Shared, Reseller plansThe accounts are... Read More
Please contact our Live Support or submit a ticket with our Billing department at our support... Read More
We would like to congratulate you on starting your online presence and thank you for choosing... Read More
The index page is the URL or local file that automatically loads when a web browser starts and... Read More
Powered by WHMCompleteSolution